
Create a collection catalog PDF
Choose a collection with products, apply a catalog design and download the completed PDF.
Select a screenshot to view it at full size.
Before you start
A catalog places the products in one Shopify collection into a document using its assigned design. Your products and collection membership must have synchronized. Choose a collection with a nonzero product count and check the catalog allowance in Billing. Editor Preview is useful for design, but uses sample products.
See Plans and limits for current allowances and access.
Walkthrough: review before printing
This short visual sequence shows where the collection, design and print controls live. It does not generate a PDF or change a template assignment.
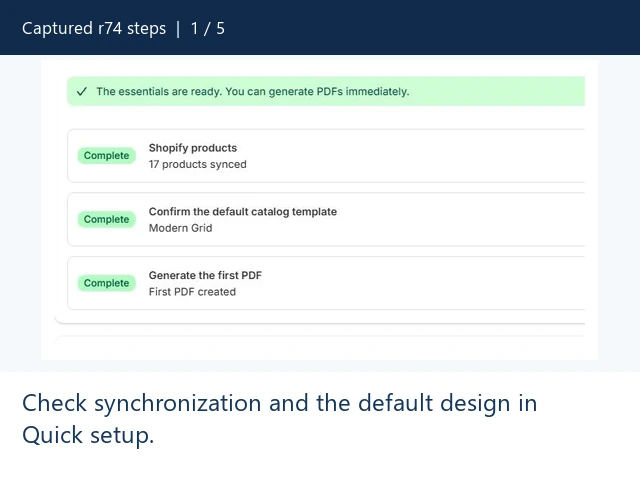
Review a collection before printing
A silent sequence of captured app states, with captions. This is a step walkthrough, not a continuous screen recording.
Paused. You can also read every step below.
Read the walkthrough steps
- Check synchronization and the default design in Quick setup.
- Choose a collection with products and review its assigned template.
- Review the template chooser. Cancel leaves the assignment unchanged.
- Choose Print PDF only when ready; successful new renders count.
- Use History for availability. This existing example has expired; no new PDF was generated.
Step 1 — Find a collection with products
- Open Catalog PDFs from the app navigation.
- Enter a collection title or handle in Search collections and choose Search, or browse the list.
- Check the Products count. A zero-product row shows No products instead of a usable print action.
- Use Reset search to return to the full list when needed.
If the collection is empty, add its products in Shopify and let synchronization finish. Changing the search does not change the collection.

Step 2 — Check its design
- Check the Template column for the collection.
- Keep the shop default or existing collection override when it is suitable.
- To change the assignment, use the row’s pencil control, labelled Change template, and choose a design your plan permits. Confirm the selection in that control.
- Review the design with the visual editor before final generation.
The shop default supplies the starting design unless a collection has its own assignment. An older granted assignment can have different continuity rules from a new assignment. A locked premium choice does not become available simply because you can see it.

Step 3 — Start the final catalog
- Choose Print PDF on the intended collection row.
- Follow the app’s print progress. Larger collections can take longer.
- Open PDF History to check the job and current file availability if you leave or reload the page.
- Wait for completion before downloading. Read any error shown rather than repeatedly submitting the same job.
A successful new catalog render counts as one catalog PDF. Exact reuse of an available, unchanged PDF does not create a new render. See Preview and usage.

Step 4 — Download and inspect the PDF
- Use the completed job’s download action while its file is available.
- Save the file to your device and open it in a PDF reader.
- Check actual product titles, descriptions, prices, photos and page breaks before printing.
- Choose the correct paper size and print scaling in your PDF reader.
Current Admin output normally remains available for 72 hours; follow the expiry displayed on the file. An expired row can offer Print again, which uses current source/design state and can count as a new render. Read PDF History and expiry.
Expected result
The completed catalog contains the selected collection’s synchronized products, arranged with its assigned design. Open the downloaded file and check the first page, a full product page and the final page before printing.
Important notes about reuse and expiry
- Exact reuse requires an available file and matching render inputs. A changed source or design can require a new render.
- Current Admin output normally remains available for 72 hours; use the expiry shown for the file.
- An expired History row is not a stored copy you can recover. Print again uses current source/design state and a new successful render counts.
Troubleshooting this workflow
- No products: the disabled action reflects an empty synchronized collection.
- Unexpected template: check a collection override before changing the shop default.
- Job still processing: follow its existing progress/History entry instead of repeatedly submitting it.
- Allowance reached: check Billing and the monthly reset before another final render.