
PDF Print Orders
Customize PDF Templates and Branding
Choose a template family, displayed fields, numbering, and validate the live PDF preview.
Each step below uses a different real editor state so controls are not repeated or cropped from one Branding screenshot.
1
Choose the document and template family
- Select Invoice, Packing Slip, Receipt, or Refund.
- Choose the template family.
- Apply it to the current document or intentionally to all documents.
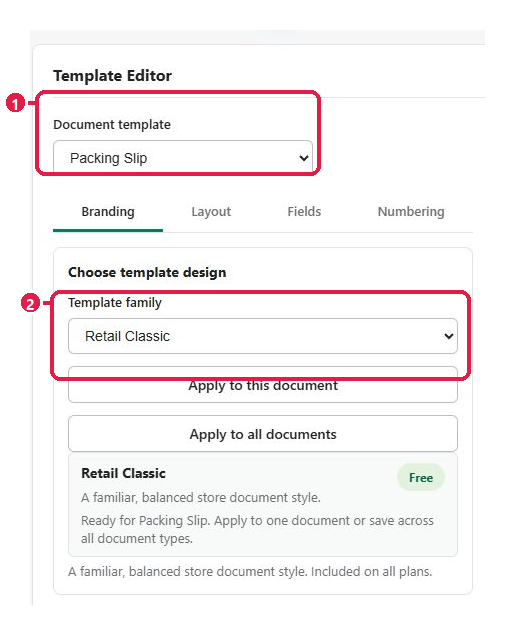
Expected result: The chosen document and family are visible before customization.
2
Choose the fields that appear
- Open Fields at marker 1.
- Use marker 2 to review Logo, Tax details, Discounts, Order notes, Billing address, and Shipping address.
- Keep only the fields required by the workflow.
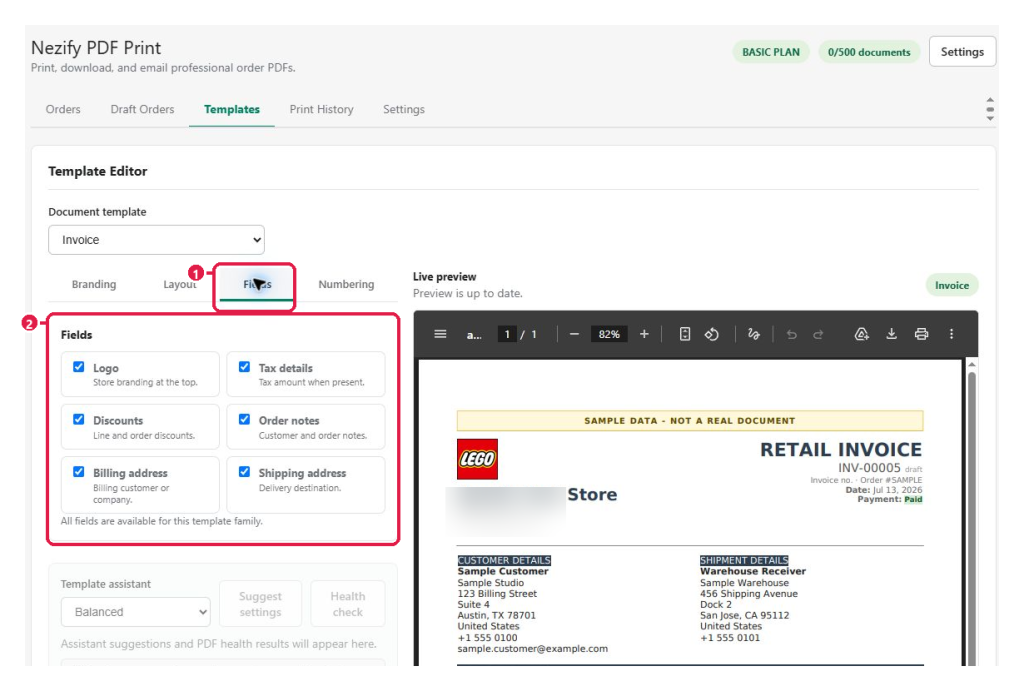
Expected result: The live preview reflects the selected field set.
3
Configure numbering and validate the preview
- Open Numbering at marker 1.
- Configure prefix, suffix, start number, and minimum digits at marker 2.
- Inspect the complete live preview at marker 3.
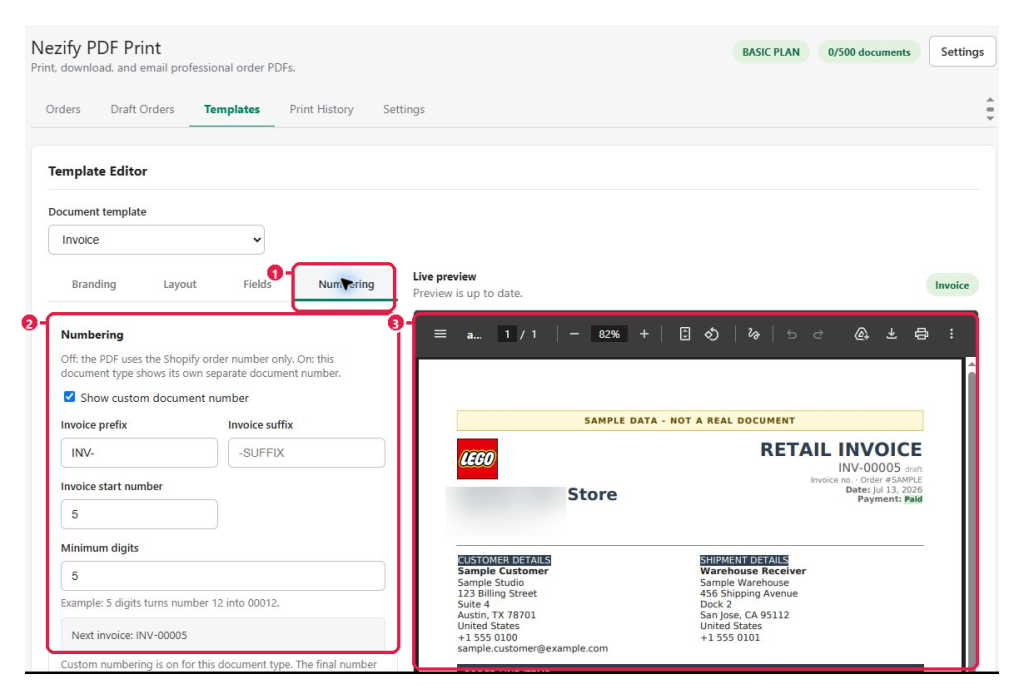
Expected result: The preview uses the intended number format without layout overflow.
Tip: The editor preview uses sample data and does not send a customer document.
This guide was last updated on July 13, 2026.